Media Backup on Android
You can use the FileCloud app to sync media (automatically back up photos and videos) to the FileCloud server in the background.
- The FileCloud app will automatically detect new photos and videos and back them up to the selected location.
To enable automatic backup, you either need an administrator account or your administrator has to configure this setting for you.
To configure automatic backup of photos and videos:
To configure the backup settings:
- Open a browser and log in to the admin portal.
- From the left navigation panel, select Settings.
- Select the Endpoint Backup tab.
- Next to Allow Camera Uploads, select the checkbox.

- Click Save.
To configure your Android device:
- Open the FileCloud app.
- In the upper-left corner, tap the menu icon.

A list of options opens. - Click Settings.

- In the list of settings, slide the Enable media Sync switch to the right so that it is on.
Tap Source.
Choose a location on your phone to sync files from.
Destination folder is a read-only field set by your admin that displays where your backed up media is stored in your FileCloud folders.
1 Enable media sync - Turns media sync on.
2 Source - (optional) The local folder the app retrieves pictures from for backup. By default, your Android's main camera folder is used. To choose a different folder, click Source, and then click Select a storage space.
3 Destination folder - (read-only) Displays the path to the folder in FileCloud where your media is uploaded and stored for backup.
The progress and results of a media sync are shown in the File Operations window.
If the media sync is still being performed, the window shows you its progress. When the operation completes, the window displays a finished message with a green check icon if it completed successfully or a red x icon if it finished with errors. You can see log records of the completed operation by clicking the arrow next to it.
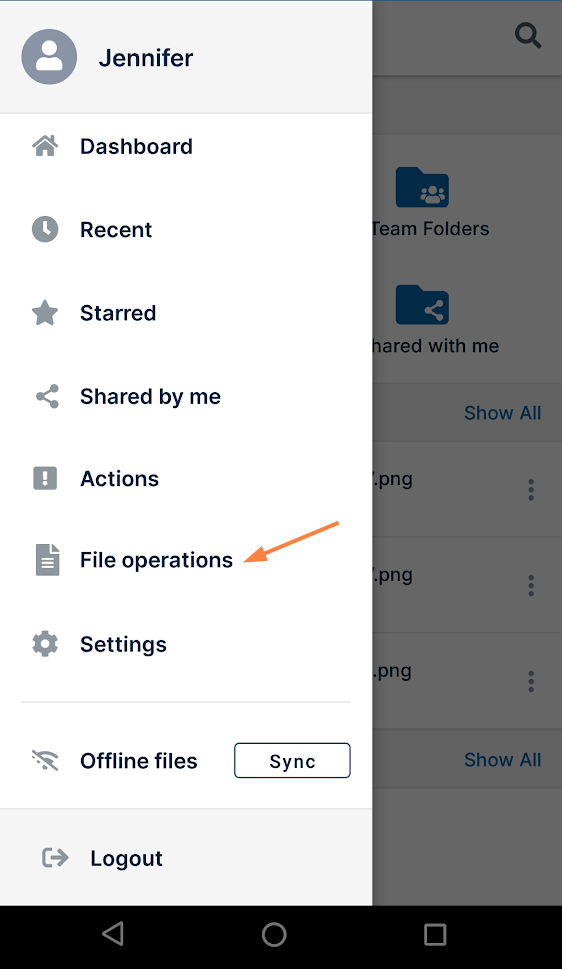
To open the File Operations window:
- Tap the menu icon in the upper-left of the screen.

The navigation pane opens. - Tap File Operations.
The File Operations window opens and displays the most recent media sync. - Tap the arrow next to the media sync action to see the log files associated with it.

- You can filter sync logs by entering a text string in the Filter logs box or, to view log files by status, by tapping the label next to the Filter logs box and choosing All, Info, or Errors.

Viewing errors
If you want to see a list of sync errors, tap the label of the Filter logs box until it says Errors, as in the following screenshot.
When you filter by errors, each error log entry has an info icon next to it that you can tap to view error details.
The details for the second log entry in the image above appear as follows: